Please visit my full website at: www.carvinginnyc.com
A new carving underway
Went into my wood stock the other day and came away with a really nice slab of black walnut. I know what I will do with it. There are a couple of ways a carving usually comes about. There are those times when a piece of wood calls to you. It whispers into your minds ear and tells you what it will become. Other times you will find something you wish to create and then search out the right piece of wood for the project. This will be one of the latter types.
Every now and then I set out to do a carving just for myself. Most of the time I am busy doing carvings as gifts or because they have been requested by family or friends. So now when I do a piece for myself, I try to do a "wow" piece. In my everyday life I come across images which inspire me and I keep them in a file stored on my computer. I have long admired the designs used in leather craft and I think they easily cross over into woodcarving. They are almost very shallow relief carvings. This particular design is a leafy swirly pattern with a textured background. It will be my first carving which uses leather craft as its inspiration. In my mind's eye I am picturing myself transforming this design into a deep relief with lots of undercutting which will give the finished carving great shadowing and make it interesting to the viewers eye.
© Jim Linnell
In my early carving years, I simply would have used it and given it no thought, but now that I consider myself an artist I am mindful of other artists copyrights. I routinely make my own original designs these days but every now and then I come across a design that is so appealing to me, I just want to use it to make a carving from. I did my research and found out whose design it was. His name is Jim Linnell. I sent him an email asking his permission to use it as a basis for my next carving. He said me choosing his work was quite flattering and he gladly gave his permission. I will keep a copy of the email for my records.
Using a photo program, I re-sized the pattern at 16"x23" using 16" as a base since that is the width of the walnut slab. I asked a friend of mine to cut the slab of walnut to match the 23" length that the pattern will require. I will get the panel back in a few days and then the carving will get underway.

|
This is a beautiful clear slab of
black walnut. Anyone who has ever carved black walnut knows that the
hardness of the walnut will add a difficulty factor to the carving so
this will not be a quick carving. However I should be rewarded for all
the extra work. It should turn out beautifully. I expect it to take a
month or more to carve. The way to approach a carving of this size is
to do a little at a time. Hand carving will mean a pretty good workout
for my hand, arm, shoulder and back muscles. Slow and steady will win
this race. And you thought carving was easy.
|
Black walnut 16"x23"

|
I have printed out the pattern to the correct size using my home
printer. I have taped the pages together to form 1 large pattern.
|

|
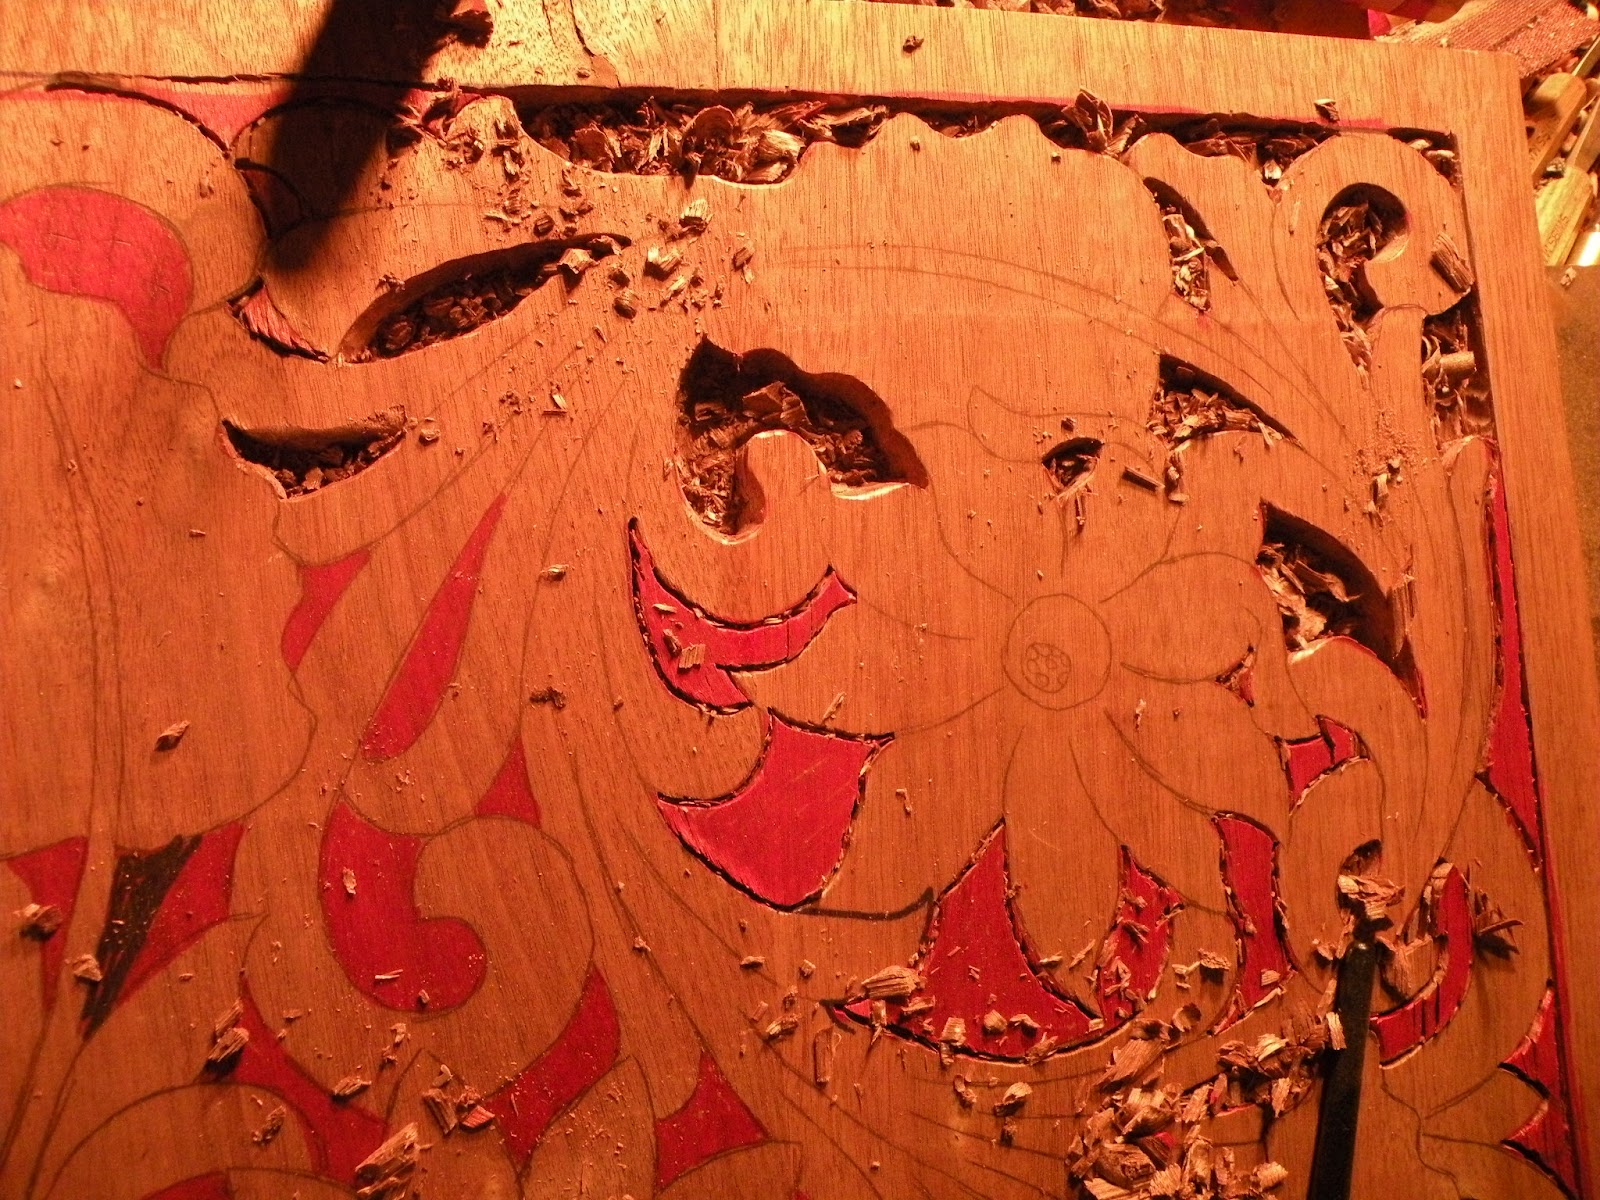
As this is a complicated patten with lots of intertwined positive and
negative spaces so I have taken the extra time to color code this so I
don't make any mistakes when removing the areas that need to be removed.
Even when doing the color coding I made a mistake as evidenced by the
black marking in the upper right corner. It just proved the need for
taking the extra time to do the coding as the eyes can fatigue while
looking at a large complicated pattern. I have checked and
double-checked to make sure it is all colored correctly.
|


|
These are the tools I will be using for the basic wood removal stage.
They are relatively flat profiles, # 3, 4 and a small # 5 to get into
the tighter areas. There is also a v-tool here to help keep the bottoms
of the cuts perpendicular to the surface.
|

|
This is the proper way to hold a chisel when working with a mallet to
stop-cut the areas needed to be removed. Holding the tool like this
allows for quick placement of the cutting edge when going around the
pattern lines. Place tool, whack, whack with the mallet. Place tool,
whack, whack etc. Working this way you get into a nice steady rhythm.
|

|
I have taken the corner and removed the first piece of wood to set the
depth of the rest of the carving. This wood is 1" thick. The general
rule of a deep relief on panel is the go halfway into the wood, thereby
allowing the wood to retain its strength which will discourage any
future warping. The larger a piece of wood, the more noticable its
reaction to the relative humidity of its surroundings can be. Sometimes
wood can act like a sponge and absorb good amounts of the water in the
air which can slightly change its size and shape.
|

|
Using a depth-gauge, a tool any relief carver should have in his/her arsenal, I have set the depth of this background at 1/2"
|

|
Here is what a proper stop-cut should look like. It should ride just shy
of the pattern line into the waste wood. the red area will be removed.
|

|
This is where I am after a couple hours of carving. I told you this
will be slow going due to the hardness of the wood. It takes quite
awhile to remove 1/2" of walnut and level the bottom in spaces this
tight and irregularly shaped.
|

|
All the waste areas have now been cut away. It is time to do what I consider the "fun part", the shaping of all of the forms
|

|
After looking at the entire pattern, I start the design at the part that will need to be pushed the furthest back. once the lowest depth has been established, it is easier to figure out how deep to go with the rest of the carving.
|

|
I find the corresponding flower on the wood checking to make sure it is the correct area. when working with a large pattern, it is easy to get side-tracked and mistake one area for another. Always check and double check.
|

|
The first cut is made with the v-tool around the center of the flower
|

|
The purpose of this cut is to protect the center part of the flower when carving the petals in towards the center.
|

|
I then move on to the rest of the flower, separating each petal.
|

|
The actual shaping is done using gouges. here I am using a #7 gouge which will create a deep curved surface which the light will play off of.
|

|
Here you can see that the petal now has a shape to it.
|

|
All the petals have now been shaped. The direction of the light source can create interesting shadows. It is always advisable to have adjustable light sources placed at the sides while doing relief carvings. The shadowing effects will change as the light sources moves. It will enable the carver to decide when the form is pleasing to the eye.
|

|
The center button is now formed and pushed further back into the wood.
|

|
The broad leaves are now shaped using #5 and #7 gouges
|

|
The stems are shaped and played with as an acanthus form. Acanthus carving is a very old form of carving originating with the ancient Greeks. It is a stylized (rather than realistic) form of leaf and stem carving which creates flowing forms.
|

|
The rest of the carving is now being worked on. Each main form is separated from the next by using the v-tool.
|

|
Once you complete an area, you work on the next adjoining area. The level of one area will be dependant on the level of the previous area. In this way, things will appear in the right relationship to each other with some things higher and somethings lower, depending on what the pattern requires.
|

|
The carving is now well underway with only a few forms on the left side still to be finalized.

The carving is basically finished and I am working
from right to left cleaning it all up. The undercutting is successfully
giving nice shadows to the form.
I have used some texturing punches to give a contrast to the background.
My last step before applying the finish is to sign my work.
I have used Minwax Satin Polyurethane for the protective coat.
Now the beauty of the black walnut shows through.
I hope you can understand why I choose this wood for this particular
design. Another wood might not have given such spectacular results.
In time and with some exposure to light, this walnut will turn a deep dark
brownish-black and will have a very rich feeling to it.

This is the finished carving.
The reward for carving hard wood is wonderful details it takes.
Thank You for the inspiration, Jim Linnell
I hope you've enjoy seeing it progress as much as I've enjoyed carving it.
|


2 comments:
I just discovered your Web page and blogg. As a self taught carver, I am always searching for instructional material and inspiration. Thank you for showing your approach to patterns designed for leather. Also, for helping to define classical methods in carving. I plan to visit your site again.
Very nice effort and result. Congratulations. www.couragetolaugh.com. My father was a NYC master woodcarver in the 60's and 70's. My book shows some of his work and that of his great. great grandfather back in Sicily.
Post a Comment